So, much trailed and with much excitement on my part, my heated propagator arrived last week and yesterday I was able to put it to use.
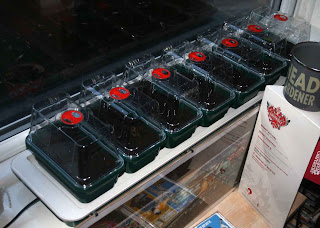
It has six small trays which sit on top of a longer heated tray which, according to the instructions, raises the temperature of the soil by about 8 degrees.
This is a very long post so without further ado, here goes:
The heated propagator unwrapped and ready for use on the windowsill
First I filled each tray with potting compost, about 4/5ths full....
... and then put the cover on to seal in the moisture and the warmth. Note that the air vent is shut.
Once I had filled every tray I put them on all the heated base and left them for a couple of hours, to initially warm up the compost which I keep outside so was quite cold.
Once I was happy that some heat was in the soil I got ready for planting. This is the Ghost Chillies ready for planting. The labels are actually from a jam set but will do just fine.
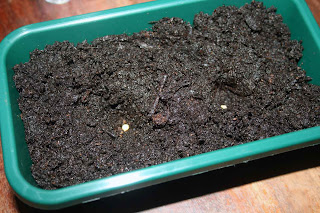
The ghost chilli seeds planted into very shallow dents in the compost, and ready for covering with a dab of compost.
Each pot will be labeled with the plant, and the planting date. This is obviously the ghost chilli pepper which I have just planted.
Next to be planted were three trays of Crossley's Special Chillis. These are the ones which I grew last year. I have no idea if the seeds are still viable but hey, it's worth trying. I have planted two seeds per tray and kept the rest in the sealed box in the picture. Waste not want not and all that.
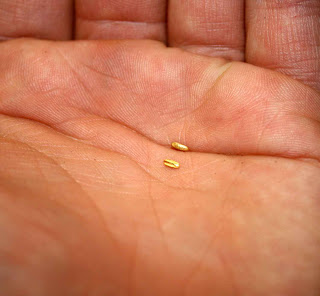
These are foxglove seeds, which as so tiny it's almost incredible that they will grow into such lovely tall flowers. That is the palm of my hand ;)
The foxglove seeds were too small to sow individually so I took the collection in the previous picture and spread them as equally as I could across the compost. You can see the condensation from heating the soil quite clearly in this picture.
These are two geranium seeds ready for planting. Seeds are so tiny.
Using the same technique as for the chillis I have planted the geranium seeds in shallow dents which I will cover with a few millimetres of compost.
The geranium tray nicely labelled and ready for putting onto the heated tray part of the propagator.
Last but not least the Echinops Ruthenicus (or Globe Thistle) seeds about to be planted.
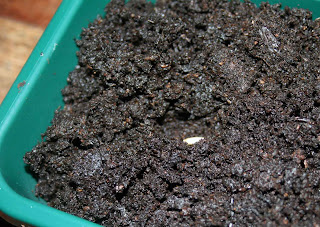
One of the two Globe Thistle seeds in the soil. I am quite excited by these as I love how thistles look, and they are really good for attracting bees and other pollinators.
And the final tray labelled and ready for warming.
All of the seed trays placed on top of the heated tray and (hopefully) slowly germinating.
So, there you have it. I have planted four trays of chillis and three trays with different flowering plants in them.
Fingers crossed this works and I get some good germination from all these seeds. Due to limited space I am not going to be growing that many of each plant this year so if I am unlucky I could end up with very little happening.
Finally in this post, I'm a little concerned that the potting material in the coriander pot is rubbish as the plant, which has grown well, is starting to look a little limp. I think I may have to do something about that and put them into a new container or two, with the better quality compost designed for helping seedlings get going.
Thanks for reading, hope you enjoyed, and come back again soon.


No comments:
Post a Comment