Showing posts with label echinops ruthenicus. Show all posts

Saturday, 2 March 2013

Lots of progress

So it is the weekend again and it is time for the latest update photographs from around my house.

I have a LOT of photographs so I will crack on now without any further delay.

The mint plant really flourishing. This is left behind the curtains all the time so it has lots of light, and I am watering it about once or twice a week at most.

The Moneymaker Tomato self watering planter. This is the one which I massively over-watered originally however the water has drained through into the reservoir and the soil is now the correct moistness; I think this idea is one of my favourites that I have ever come across.

Gardeners Delight and another Moneymaker Tomato. The self watering planters are really proving themselves.

The two Ghost Chilli Seedlings. I think these need another week or so in the heated propagator however they are looking very strong and healthy.

The biggest of the Crossley Special chillis, showing good second growth. The other five plants are all coming on and I am starting to think it is time to re-pot these into their final homes (which will also free up the heated propagator to allow me to plant other things).

The cloud of Foxglove seedlings seen through the cover of the heated propagator.

At last the second Geranium seedling has popped through. The first one is definitely ready for re-potting.

If you close one eye, squint the other and stand on your head you may be able to see the TINY seedling in this photograph (taken with a zoom lens standing on a chair as I do not have a macro lens... yet) which I think is a Echiniops Ruthenicus seedling. There are two of these showing but the other one is even harder to see!

The tray of Parsnips growing in their toilet rolls. I have been ensuring that there is standing water in the tray at all times.

The only Parsnip seedling so far showing and, as with the Echinops Ruthenicus seedlings, very very tiny.

The tray of Carrot seedlings (and yes, there are a number of seedlings) also with standing water to act as a kind of self watering system.

A single carrot seedling striving to the sky and with it's first little leaves opening nicely.

This carrot seedling has still got it's seed casing around it and stopping the small leaves from opening. This is a problem and I will blog tomorrow about removing it.

The shop bought Chive plant outside and still alive. It is looking a little unhappy, but is still growing. I think this needs moving to a more sunny position.

The shop bought Coriander which has bedded itself in well in it's new home. This, unlike the Chives, looks like it is OK with not being in direct sunlight.

A tiny Lettuce seedling, shown next to some hay and a chunk of moss.

Onion spikes luxuriating in the sun, but not really growing much.

The Broccoli, still the most advanced of my early outdoor plantings, but not really growing much either.

Just to do a quick summary, these early plantings have already been overtaken by the seedlings (like the Carrots) which were planted two months later. I think they have not really been a great success. I am hopeful, though, that with the advent of spring (and yesterday was 1st March) they may suddenly explode into growth and I will get a good early harvest. To test this I will be planting the same seeds again outside in the next month to see if the next seeds overtake the winter planted seeds.

Three oranges growing on the Citrus Tree.

The Citrus Tree (though I'm not sure it is large enough to really warrant the label "tree").

The tray of seed grown coriander which is another success; all the seedlings have reestablished themselves and are growing again.

One of the seed grown Coriander seedlings (which had previously been one of the worst looking seedlings) now showing how much it has grown.

Right, that is my update; short I know :D

It is great to see so much success and I have another blog ready for you tomorrow, and may even get round to doing some of my re-potting today also (which of course I will also photograph and blog).

Keep growing.

Sunday, 10 February 2013

New Heated Propagator and planting in it

So, much trailed and with much excitement on my part, my heated propagator arrived last week and yesterday I was able to put it to use.

It has six small trays which sit on top of a longer heated tray which, according to the instructions, raises the temperature of the soil by about 8 degrees.

This is a very long post so without further ado, here goes:

Heated propagator unwrapped and ready for use on the windowsill
The heated propagator unwrapped and ready for use on the windowsill

One of the propagator trays being filled with potting compost
First I filled each tray with potting compost, about 4/5ths full....

One tray filled and sitting on the heater to warm the compost
... and then put the cover on to seal in the moisture and the warmth. Note that the air vent is shut.

All of the trays filled with slowly warming compost
Once I had filled every tray I put them on all the heated base and left them for a couple of hours, to initially warm up the compost which I keep outside so was quite cold.

Ready to sow the ghost chillies with labelling equipment and the tray
Once I was happy that some heat was in the soil I got ready for planting. This is the Ghost Chillies ready for planting. The labels are actually from a jam set but will do just fine.
Ghost chilli seeds planted and ready for covering over
The ghost chilli seeds planted into very shallow dents in the compost, and ready for covering with a dab of compost.

Ghost chilli planted and covered and with the lid on the tray
Each pot will be labeled with the plant, and the planting date. This is obviously the ghost chilli pepper which I have just planted.

Crossleys special chilli seeds planted and covered, and spare seeds saved
Next to be planted were three trays of Crossley's Special Chillis. These are the ones which I grew last year. I have no idea if the seeds are still viable but hey, it's worth trying. I have planted two seeds per tray and kept the rest in the sealed box in the picture. Waste not want not and all that.

Fox glove seeds nestling in the palm of my hand
These are foxglove seeds, which as so tiny it's almost incredible that they will grow into such lovely tall flowers. That is the palm of my hand ;)

The foxglove seeds were too small to sow individually so I took the collection in the previous picture and spread them as equally as I could across the compost. You can see the condensation from heating the soil quite clearly in this picture.

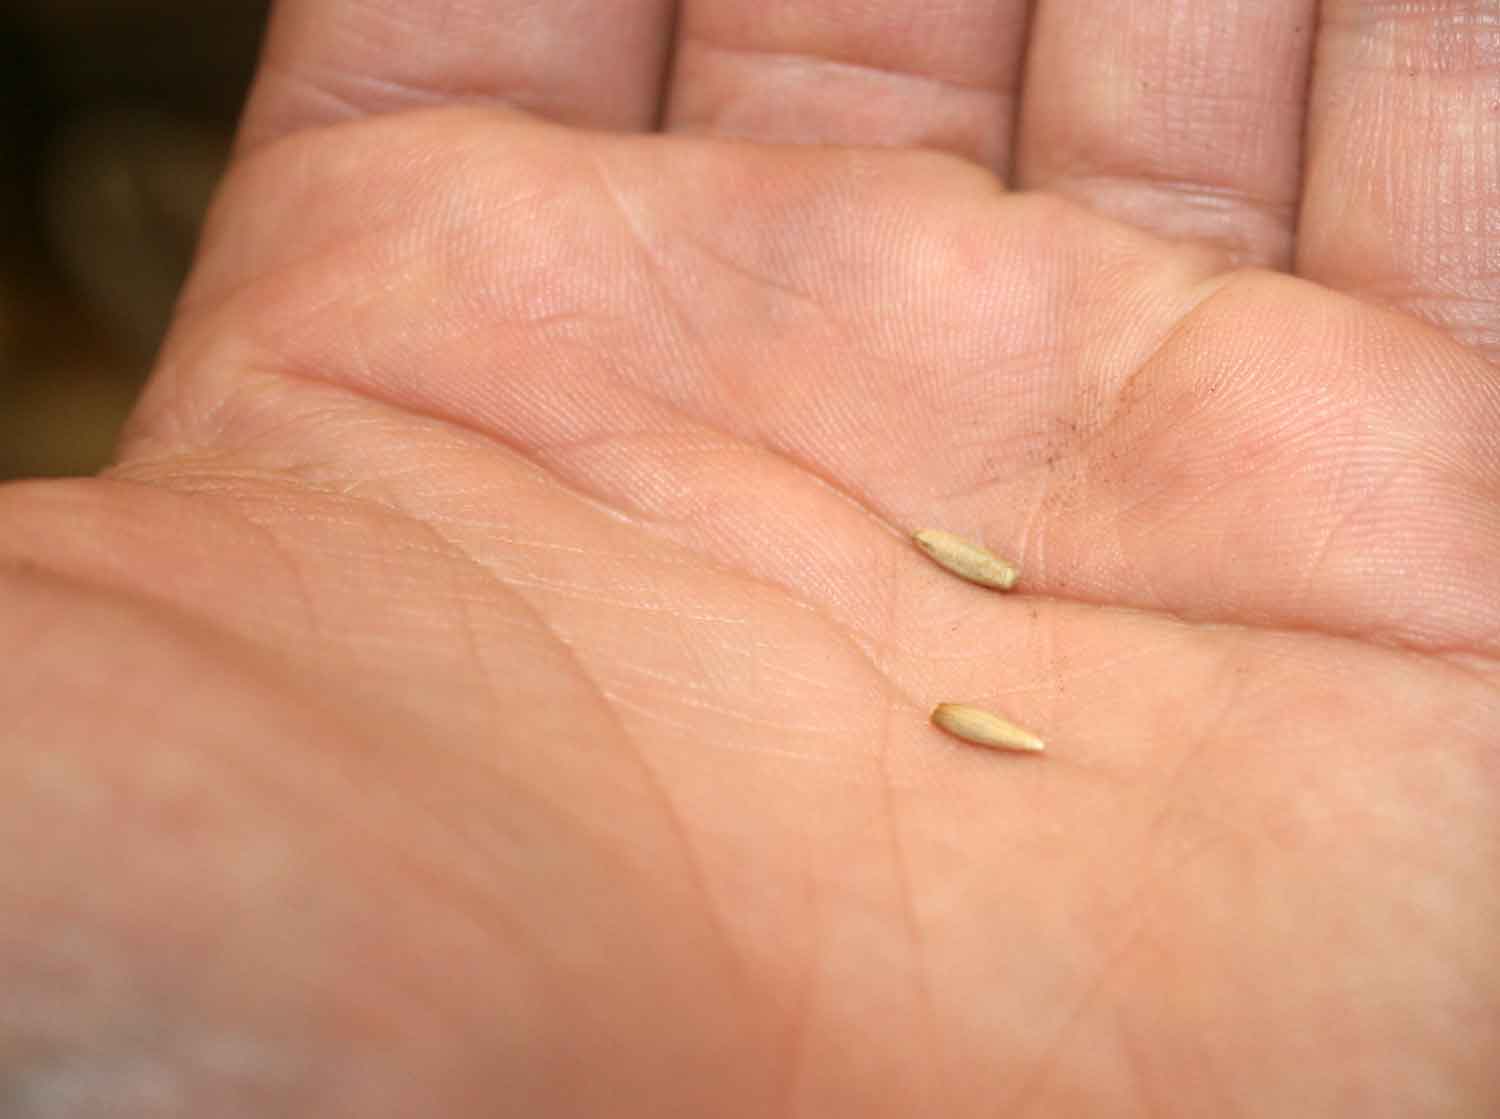
Two geranium seeds in the palm of my hand
These are two geranium seeds ready for planting. Seeds are so tiny.

The geranium seeds in 10mm deep dents in the moist compost
Using the same technique as for the chillis I have planted the geranium seeds in shallow dents which I will cover with a few millimetres of compost.

The geranium tray labelled and ready for setting on the warming tray
The geranium tray nicely labelled and ready for putting onto the heated tray part of the propagator.

Echinops Ruthenicus (or Globe Thistle) seeds on the palm of my hand
Last but not least the Echinops Ruthenicus (or Globe Thistle) seeds about to be planted.

One of the Globe Thistle seeds in the soil ready for covering
One of the two Globe Thistle seeds in the soil. I am quite excited by these as I love how thistles look, and they are really good for attracting bees and other pollinators.

The final tray of Echinops Ruthenicus covered and labelled
And the final tray labelled and ready for warming.

All the trays set on the heating element
All of the seed trays placed on top of the heated tray and (hopefully) slowly germinating.

So, there you have it. I have planted four trays of chillis and three trays with different flowering plants in them.

Fingers crossed this works and I get some good germination from all these seeds. Due to limited space I am not going to be growing that many of each plant this year so if I am unlucky I could end up with very little happening.

Finally in this post, I'm a little concerned that the potting material in the coriander pot is rubbish as the plant, which has grown well, is starting to look a little limp. I think I may have to do something about that and put them into a new container or two, with the better quality compost designed for helping seedlings get going.

Thanks for reading, hope you enjoyed, and come back again soon.